Hello folks, If you are passionate about Java programming or just starting your journey, you’re in the right place. In this blog post, we will explore 10 different Java programs focused on patterns and loops. Whether you’re a student, a coding enthusiast, or a professional developer, these examples will enhance your coding skills and give you hands-on experience with practical Java programming.
Pattern 1: Half Pyramid triangular pattern
Explanation:
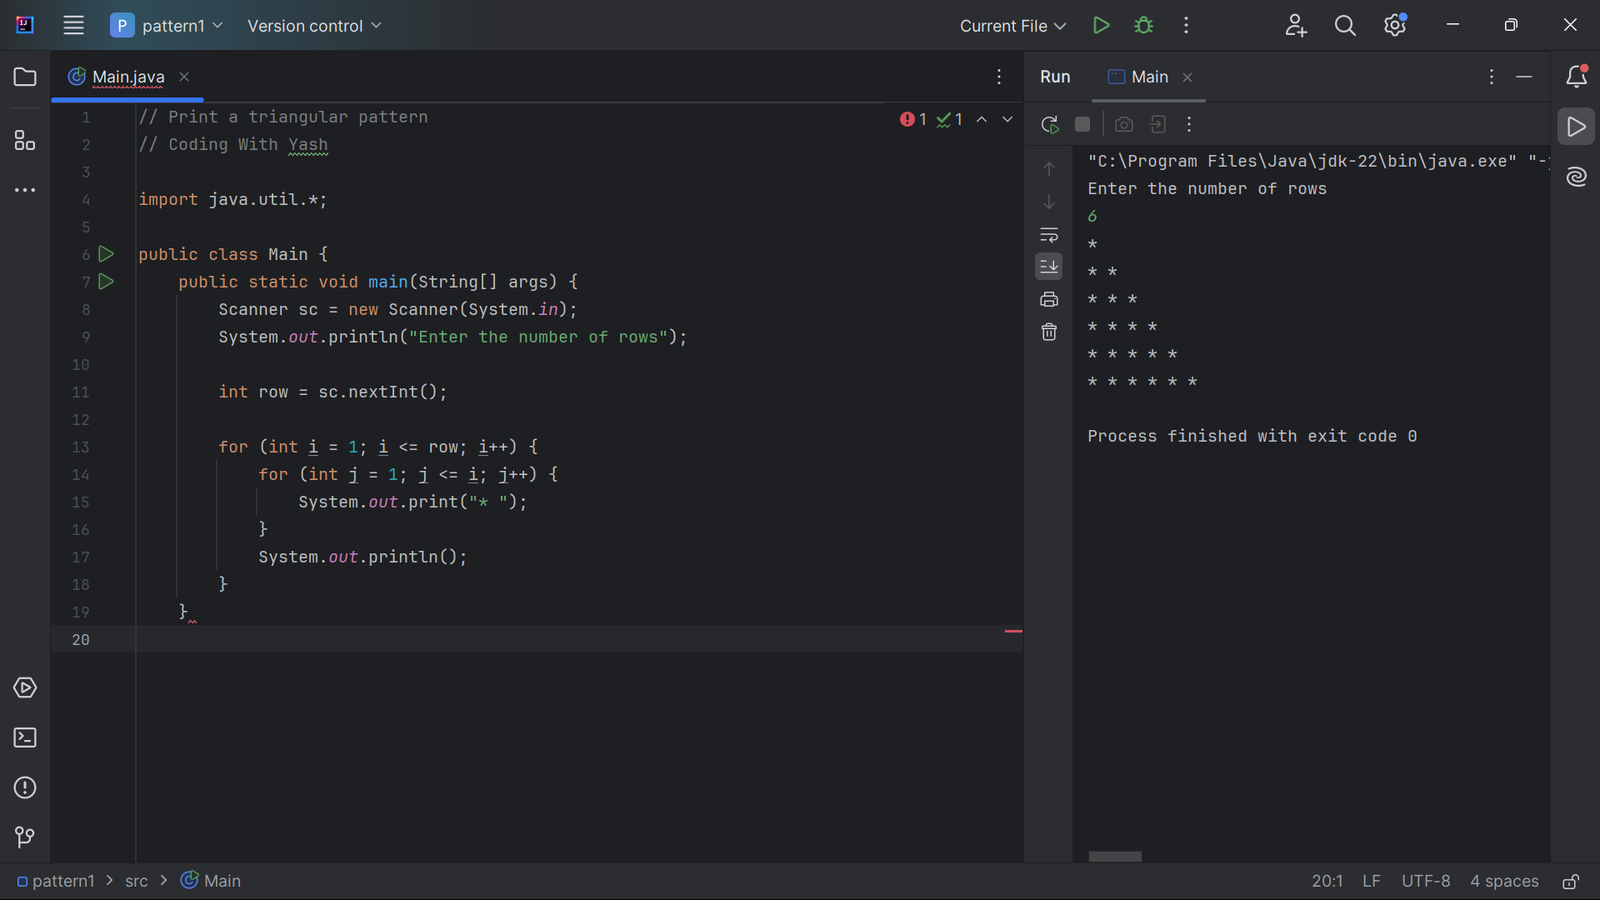
In this pattern, we will be printing a Half Pyramid Triangular based on the number of rows entered by users as you can see the number of rows is adjusted by the outer loop, and the number of columns is adjusted by the inner loop. In this program, the number of rows is entered by the user which we have stored in a variable named row, and the number of asterisks in a row depends on the value of I,
For example, if we are in the first row then the number of asterisks will be 1, if we are in the nth row then the number of asterisks in that nth row will be equal to the value of n.
Source code:
// Print a triangular pattern
// Coding With Yash

import java.util.*;

public class Main {
    public static void main(String[] args) {
        Scanner sc = new Scanner(System.in);
        System.out.println("Enter the number of rows");

        int row = sc.nextInt();

        for (int i = 1; i <= row; i++) {
            for (int j = 1; j <= i; j++) {
                System.out.print("* ");
            }
            System.out.println();
        }
    }
}
Pattern 2 Inverted half triangular pattern
Explanation:
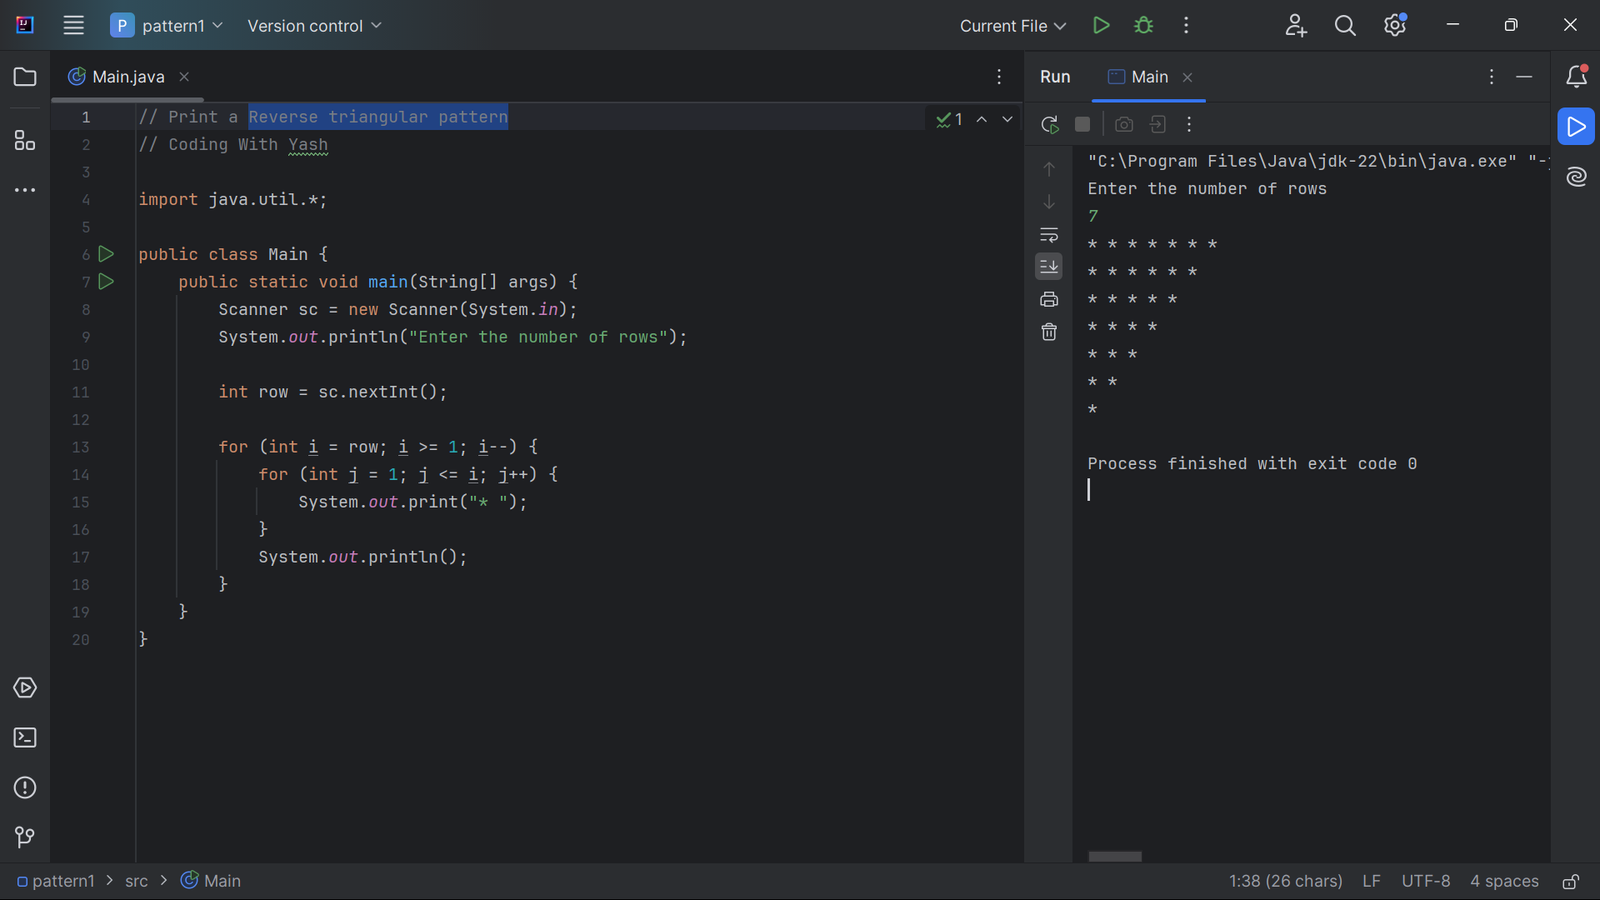
This is similar to the above pattern the only difference in this pattern is the outer loop. In this pattern, we will be printing a Reverse Triangular pattern based on the number of rows entered by users. In this program, the outer loop starts with the value of row and decreases until it reaches 1. The inner loop runs from 1 to the current value of the outer loop (i), printing the asterisks.
For example, if the user enters 5, the first row will have 5 asterisks, the second row will have 4 asterisks, and so on, until the last row which will have 1 asterisk.
Source code:
// Print a Reverse triangular pattern
// Coding With Yash

import java.util.*;

public class Main {
    public static void main(String[] args) {
        Scanner sc = new Scanner(System.in);
        System.out.println("Enter the number of rows");

        int row = sc.nextInt();

        for (int i = row; i >= 1; i--) {
            for (int j = 1; j <= i; j++) {
                System.out.print("* ");
            }
            System.out.println();
        }
    }
}
Pattern 3: Inverted half pyramid rotated by 180 degree
Explanation:
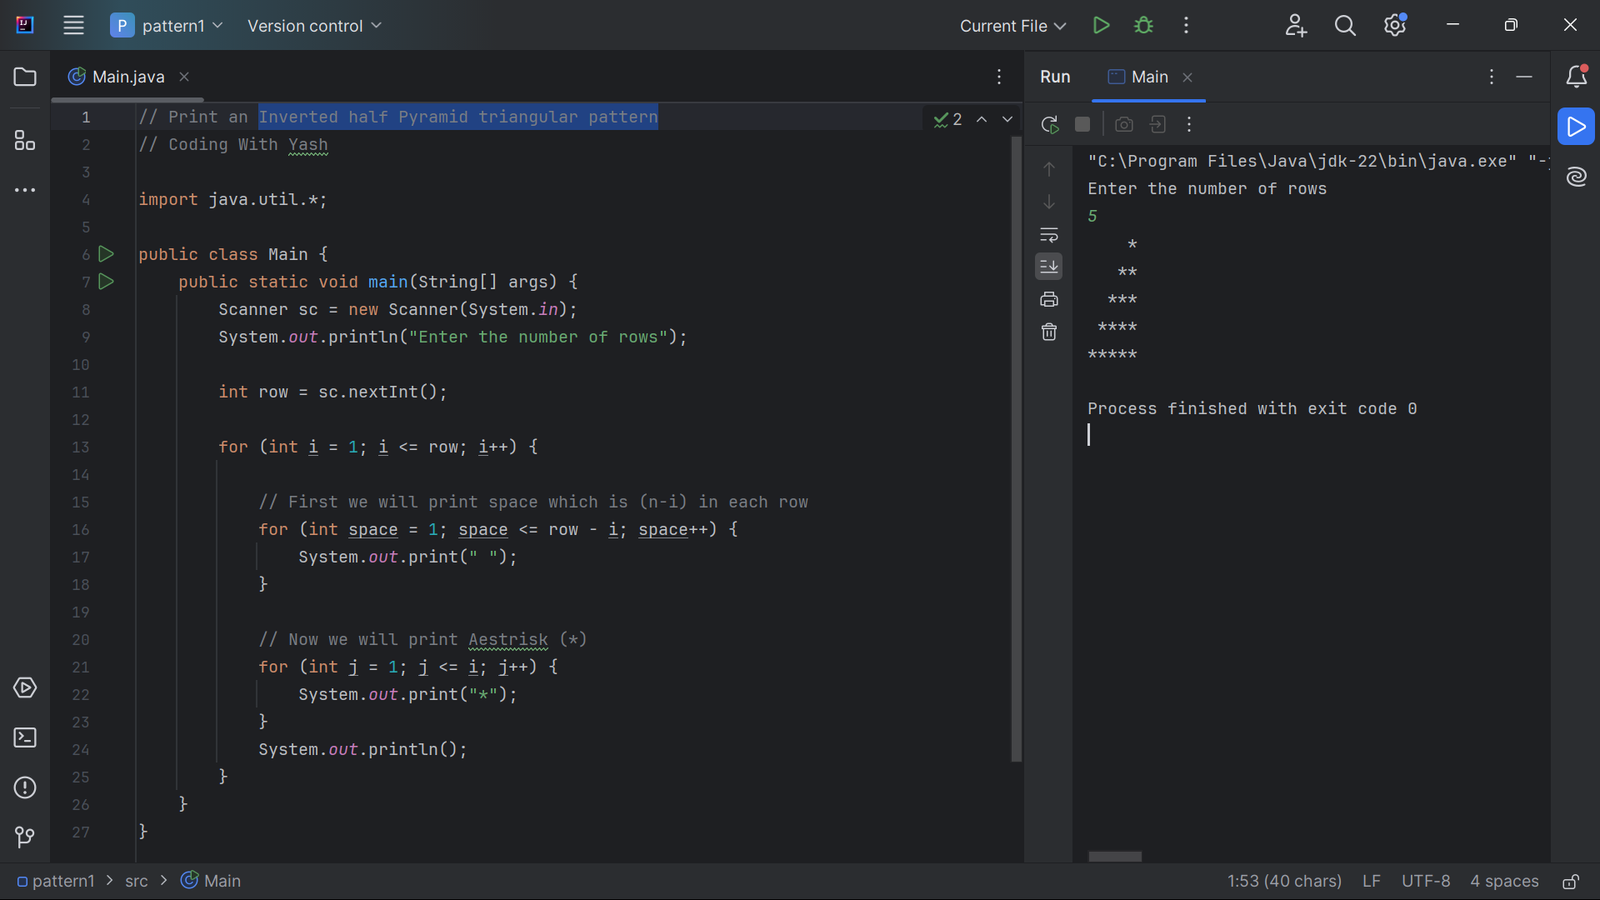
In this pattern, we will be printing an Inverted Half Pyramid Triangular pattern based on the number of rows entered by users. In this program, the outer loop runs from 1 to the value of row. For each row, we first print the necessary spaces to align the asterisks in an inverted half-pyramid shape. Then, we print the asterisks.
For example, if the user enters 5, the first row will have 4 spaces followed by 1 asterisk, the second row will have 3 spaces followed by 2 asterisks, and so on, until the last row which will have no spaces and 5 asterisks.
Source code:
// Print an Inverted half Pyramid triangular pattern
// Coding With Yash

import java.util.*;

public class Main {
    public static void main(String[] args) {
        Scanner sc = new Scanner(System.in);
        System.out.println("Enter the number of rows");

        int row = sc.nextInt();

        for (int i = 1; i <= row; i++) {

            // First we will print space which is (n-i) in each row
            for (int space = 1; space <= row - i; space++) {
                System.out.print(" ");
            }

            // Now we will print Aestrisk (*)
            for (int j = 1; j <= i; j++) {
                System.out.print("*");
            }
            System.out.println();
        }
    }
}
Pattern 4: Half Pyramid Triangular Pattern with numbers

Explanation:
In this pattern, we will be printing a Half Pyramid Triangular using numbers based on the number of rows entered by users. In this program, the outer loop runs from 1 to the value of row. For each row, we print the numbers starting from 1 up to the current row number.
For example, if the user enters 5, the first row will have the number 1, the second row will have 1 2, the third row will have 1 2 3, and so on, until the last row which will have 1 2 3 4 5.
Source code:
// Print an half Pyramid triangular pattern with numbers
// Coding With Yash

import java.util.*;

public class Main {
    public static void main(String[] args) {
        Scanner sc = new Scanner(System.in);
        System.out.println("Enter the number of rows");

        int row = sc.nextInt();

        for (int i = 1; i <= row; i++) {
            for (int j = 1; j <= i; j++) {
                System.out.print(j);
            }
            System.out.println();
        }
    }
}
Pattern 5: Floyd’s Triangular pattern

Explanation:
In this pattern, we will be printing Floyd’s Triangle, which is a pattern of numbers arranged in a triangular shape. Each row of the triangle contains an increasing sequence of numbers. In this program, we use a variable named counter to keep track of the numbers being printed. The outer loop controls the number of rows, while the inner loop handles printing the numbers in each row.
For example, if the user enters 4, the output will be: in first row 1, in second row 2 3, in third row 4 5 6, in fourth row 7 8 9 10.
Source code:
// Print Floyd's triangular pattern with numbers
// Coding With Yash

import java.util.*;

public class Main {
    public static void main(String[] args) {
        Scanner sc = new Scanner(System.in);
        System.out.println("Enter the number of rows");

        int row = sc.nextInt();
        int counter = 1;

        for (int i = 1; i <= row; i++) {
            for (int j = 1; j <= i; j++) {
                System.out.print(counter + " ");
                counter = counter + 1;
            }
            System.out.println();
        }
    }
}
Pattern 6: O and 1 Triangular Pattern

Explanation:
In this pattern, we will be printing a triangular pattern with 0 and 1 based on the number of rows entered by the user. In this program, the pattern is determined by the sum of the row and column. If the sum of rows and columns indices is even then it will print “1” and if the sum of rows and columns is odd then it will print “0”.
For example: for the index (1,1) the sum of these I and J is an even number so it will print 1, for the index (2,1) the sum of these I and J is an odd number so it will print 0.
Source code:
// Print 0 and 1 triangular pattern
// Coding With Yash

import java.util.*;

public class Main {
    public static void main(String[] args) {
        Scanner sc = new Scanner(System.in);
        System.out.println("Enter the number of rows");

        int row = sc.nextInt();

        for (int i = 1; i <= row; i++) {
            for (int j = 1; j <= i; j++) {

                if ((i + j) % 2 == 0)
                    System.out.print("1 ");
                else
                    System.out.print("0 ");
            }
            System.out.println();
        }
    }
}
Pattern 7: Solid rhombus

Explanation:
In this pattern, we will be printing a Solid Rhombus pattern based on the number of rows entered by the user. In this program, we use two nested loops to create the rhombus shape. The first inner loop prints the spaces to align the asterisks, and the second inner loop prints the asterisks for each row.
Here if you notice then you will get to know that in each line we have a fixed pattern of space that is ( row-i ). For example, if we are in the third row then the number of spaces printing will be (row-3), let’s say if the total number of rows is 5 then in this third row the number of spaces going to be printed is 2.
Source code:
// Print a solid rhombus pattern
// Coding With Yash

import java.util.*;

public class Main {
    public static void main(String[] args) {
        Scanner sc = new Scanner(System.in);
        System.out.println("Enter the number of rows");

        int row = sc.nextInt();

        for (int i = 1; i <= row; i++) {

            // First we will print the starting spaces which is (row-i)
            for (int space = 1; space <= row - i; space++) {
                System.out.print(" ");
            }

            // Now second part is printing stars

            for (int j = 1; j <= row; j++) {
                System.out.print("*");
            }
            System.out.println();
        }
    }
}
Pattern 8: Fibonacci Series Pattern
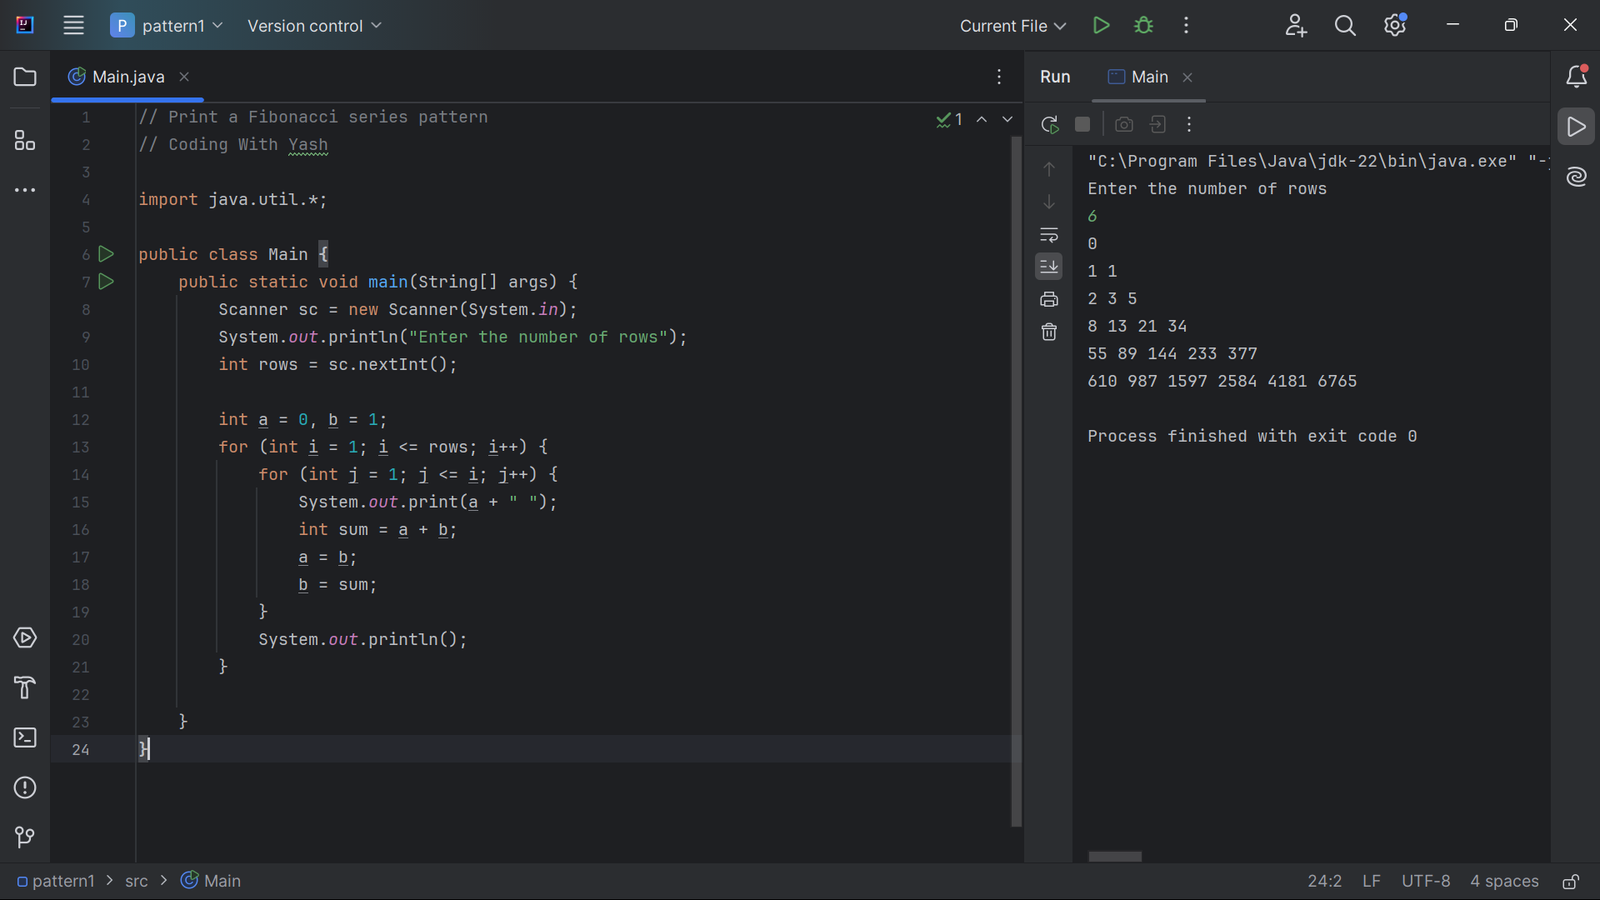
Explanation:
In this pattern, we will be printing a Fibonacci series pattern based on the number of rows entered by the user. The number of rows determines how many Fibonacci numbers are printed in each row. In Fibonacci, the third number will always be the sum of the previous two numbers, and after every step, the first number will become the second number and second number will become the third number.
Source code:
// Print a Fibonacci series pattern
// Coding With Yash

import java.util.*;

public class Main {
    public static void main(String[] args) {
        Scanner sc = new Scanner(System.in);
        System.out.println("Enter the number of rows");
        int rows = sc.nextInt();

        int a = 0, b = 1;
        for (int i = 1; i <= rows; i++) {
            for (int j = 1; j <= i; j++) {
                System.out.print(a + " ");
                int sum = a + b;
                a = b;
                b = sum;
            }
            System.out.println();
        }

    }
}
Pattern 9: Butterfly Pattern

Explanation:
In this pattern, we will be printing a Butterfly shape based on the number of rows entered by the user. The pattern consists of an upper and lower half, each containing a series of asterisks and spaces to form the butterfly shape. And if you notice carefully, you will get to know that we just need to print the upper half, because the lower half is exactly the inverse of upper part.
In this pattern, first we will print the asterisk and then the spaces and finally the remaining asterisk, so the main logic in this series is about printing the spaces which is always the 2*(rows-i) in each row.
For printing the lower half we just need to reverse the outer loop, start it from the number of rows and then we will decrease it to 1 in each step.
Source code:
// Print a Butterfly pattern
// Coding With Yash

import java.util.*;

public class Main {
    public static void main(String[] args) {
        Scanner sc = new Scanner(System.in);
        System.out.println("Enter the number of rows");
        int rows = sc.nextInt();
        // Printing the upper half
        for (int i = 1; i <= rows; i++) {
            //first we will print the initial asterisk
            for (int j = 1; j <= i; j++) {
                System.out.print("*");
            }
            // Now we will print spaces which is 2*(rows-i) in each row
            for (int spaces = 1; spaces <= 2 * (rows - i); spaces++) {
                System.out.print(" ");
            }

            // now we will print the remaining asterisk
            for (int j = 1; j <= i; j++) {
                System.out.print("*");
            }
            System.out.println();
        }

        // printing the lower half
        for (int i = rows; i >= 1; i--) {
            //first we will print the initial asterisk
            for (int j = 1; j <= i; j++) {
                System.out.print("*");
            }
            // Now we will print spaces which is 2*(rows-i) in each row
            for (int spaces = 1; spaces <= 2 * (rows - i); spaces++) {
                System.out.print(" ");
            }

            // now we will print the remaining asterisk
            for (int j = 1; j <= i; j++) {
                System.out.print("*");
            }
            System.out.println();
        }
    }
}
Pattern 10: Sandglass Pattern
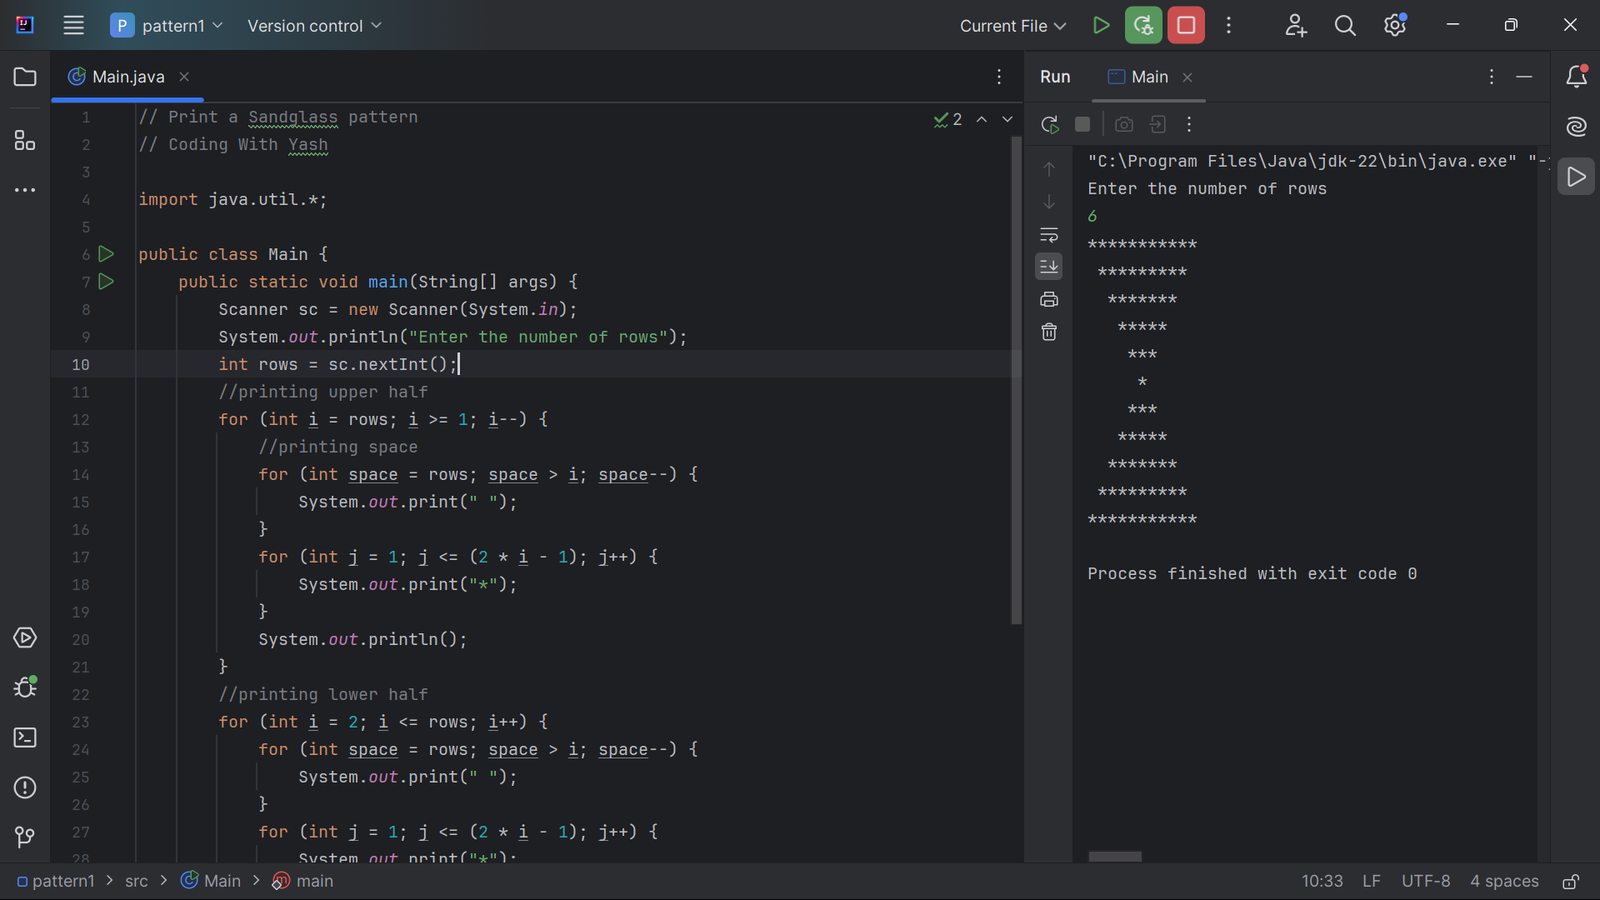
Explanation:
In this pattern, we will be printing a Sandglass shape based on the number of rows entered by the user. The pattern consists of an upper and a lower half, each containing a series of asterisks and spaces to form the sandglass shape. If you notice carefully, you will see that the lower half is exactly the inverse of the upper part.
In this pattern, the main logic involves printing spaces followed by asterisks. The number of spaces and asterisks changes in each row to create the sandglass effect. The number of spaces increases as we move down the rows in the upper half, and the number of spaces decreases as we move up the rows in the lower half. The number of asterisks decreases in the upper half and increases in the lower half.
The main logic here is we need to start the value of I from the number of rows. For example the number of rows is 5 then the starting value of i=5 and for the first row the value of I will be 5 so the number of asterisks will be 2*rows-1,that means if we are in row 1 then the number of asterisk printing will be 9 and so on.
for second row the value of I will be 4 that’s why the number of asterisk printing will be 7 and so on.
Source code:
// Print a Sandglass pattern
// Coding With Yash

import java.util.*;

public class Main {
    public static void main(String[] args) {
        Scanner sc = new Scanner(System.in);
        System.out.println("Enter the number of rows");
        int rows = sc.nextInt();
        //printing upper half
        for (int i = rows; i >= 1; i--) {
            //printing space
            for (int space = rows; space > i; space--) {
                System.out.print(" ");
            }
            for (int j = 1; j <= (2 * i - 1); j++) {
                System.out.print("*");
            }
            System.out.println();
        }
        //printing lower half
        for (int i = 2; i <= rows; i++) {
            for (int space = rows; space > i; space--) {
                System.out.print(" ");
            }
            for (int j = 1; j <= (2 * i - 1); j++) {
                System.out.print("*");
            }
            System.out.println();
        }
    }
}
Conclusion
In this blog post, we’ve explored 10 different pattern problems, each with its own unique source code and detailed explanation. These patterns are an excellent way to sharpen your programming skills and understand the logic behind loops and nested loops in Java. By practicing these patterns, you’ll gain a deeper insight into how to manipulate loops and conditions to create various shapes and designs.
Keep experimenting with different patterns and try creating your own variations to further improve your logical thinking and problem-solving skills.
Thank you for reading! If you have any questions or need further clarification, feel free to reach out in the comments section. Happy coding!